Lomography
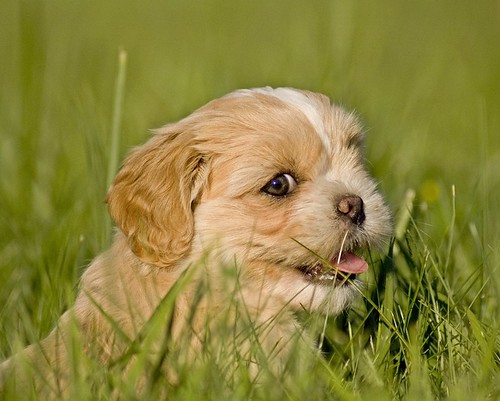
Today I'm going to give you another simple but effective technique. We're going to simulate lomography with a few simple steps. The original Photoshop tutorial I'm adapting was done by Denny Tang and can be found here. We'll be using another CC licensed photograph originally posted to flickr by user Bob Jones. Many thanks to Mr. Jones.
So, here we go.
- The first thing I did was to crop the picture a bit to remove the leg or whatever from the corner. Then I applied the contrast masking technique I went over last time to make the colors pop a bit more.

- Next, create an eliptical selection around the subject. It doesn't have to be perfect, just so it encompases most of the image.
- Invert the selection [Ctrl+i] and blur the edges by clicking Select>Feather. I used a generous value of 500 for this image, but you may want to experiment for different sized images.
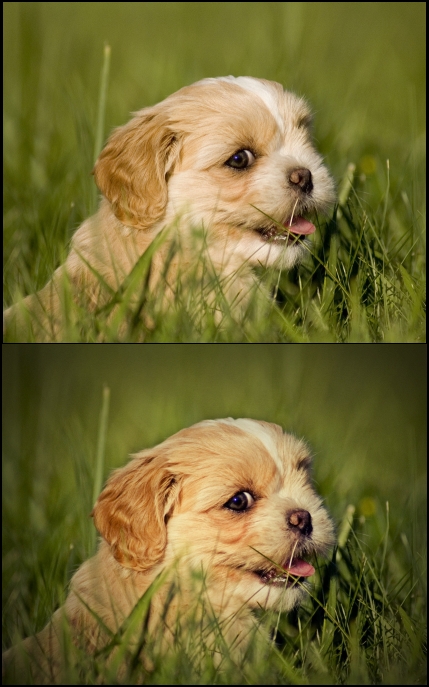
- Create a new layer and name it "Circle". Drop the opacity to 75, and fill it with black. You should have a nice soft vignette around the subject now.
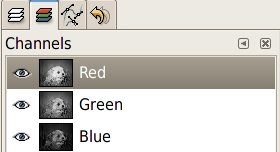
- Now on to the color distortion. First, make sure the background layer is activated, and then go to the channels dialog. Deselect all but the red channel.

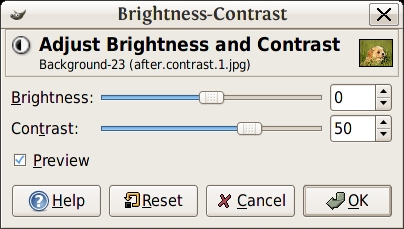
- Click Layer>Colors>Brightness-Contrast... Bump the contrast up to 50. Going back to the channels dialog, deselect the red and reselect the green channel and repeat the contrast adjustment.

Here's the before and after:

That's it! Pretty nifty eh? Please visit my flickr page for full size versions. Thank you for following along.


3 comments:
View nice post on Lomography - thank you for the tutorial. I really like how the puppy turned out. :o)
Please do D3 Items include Inkscape - it is invaluable for many and I wouldn't mind learning a bit more about its advancedGuild Wars 2 Items features.
مرحبا بكم اصدقائي في افضل موقع العاب فلاش مجاني وعربي ايضا يقدم مجموعة جد رائعة من العاب طبخ جديدة لاتضيعوا الفرصة اهلا بعشاق الطبخ معنا مرحبا بالجميع
Post a Comment